A New Bumper for
RCAT: Heat Forming Polycarbonate
David P. Anderson
(click on the images on this page for larger views)
Howdy
I've just finished making a new polycarbonate (i.e. Lexan) front bumper
for the RCAT robot and learned quite a bit along the way, so I thought
I'd share what I've learned.
The original bumper was made from acrylic (i.e., plexiglass) and while
easy to drape form in the oven, it was not very durable and cracked
easily. Here's the original bumper's wooden drape-form, which I made
from some scrape 1x6 with a bandsaw and a belt sander:
The plexiglass bumper was cut from a piece of 1/16th inch acrylic I got
at Home Depot. It was just laid over the form in the oven for about an
hour at 250 degrees. As the plastic softens, gravity "drapes" it over
the form to produce the finished curve. Here's the original bumper,
before machining:
Not bad, but in practice it began to show cracks in the first week of
use on the robot. Then a couple of weeks ago, the robot fell off the
back seat of my car when I had to brake hard and the bumper did not
survive...
The rest of the robot is made of aluminium and transparent Lexan, which
is a trade name for polycarbonate. This is much, much tougher stuff,
doesn't crack, and can be drilled and threaded without splitting, unlike
plexiglass. So I decided to make the new bumper from 3/32 poly, of
which I had a sheet, also purchased at Home Depot back in the windows
department.
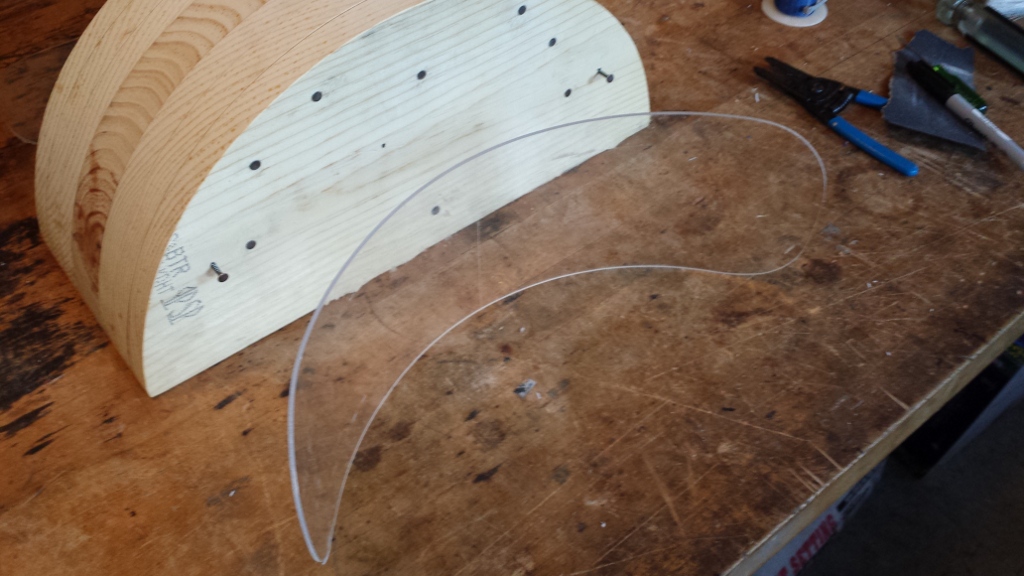
However, it's not quite so easy to heat form. For my first attempt, I
clamped a polycarbonate bumper template to the wooden form. You can see
that I also bent the ends of the bumper back, unlike the original
acrylic bumper, to provide more clearance for the robot's drive wheels:
Following some data I found on the interwebs, I dried it in the oven at
250 degrees for about 4 hours to "remove the water." After that I
increased the temperature to 450F degrees, above the melting point of
poly, for about 2 hours.
What a mess! The polycarbonate, still full of moisture, steamed and
produced millions of tiny bubbles, making it opaque. On top of that, it
stuck to the form like glue. When I finally managed to peeled the thing
off the form, destroying it in the process, this is what it looked like:
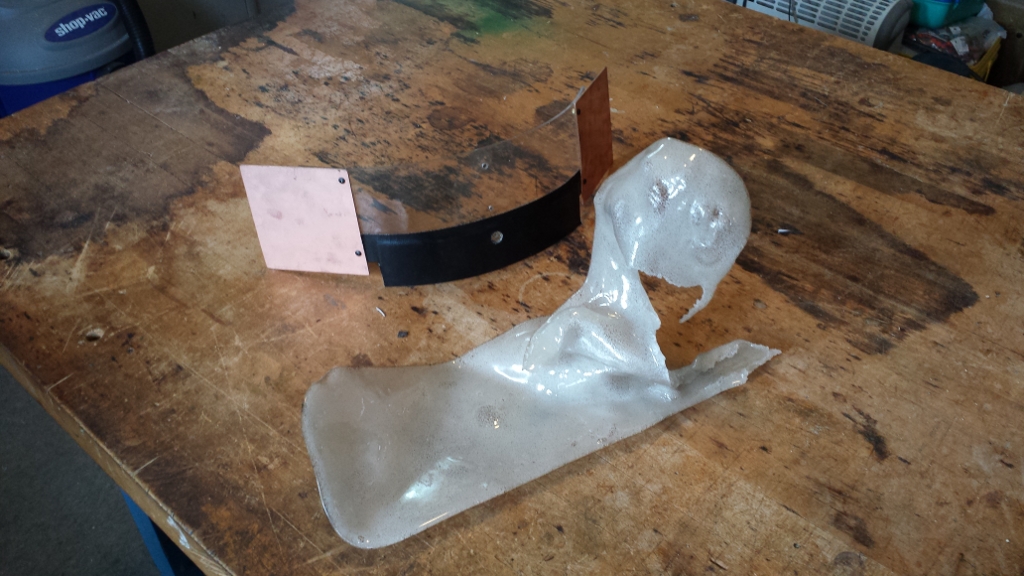
On the plus side, it is still stuck in that shape, and tough as
nails... I told my wife I'm going to sell it as artwork, titled "After
the Fall."
Ok, back to the net for some more homework. I came across a posting
from a guy who works at a company that manufactures things with
polycarbonate, and learned that there are basically three ways of heat
forming it:
1. Cold forming. This is for the case where you can bend the poly into
the required shape while it's at room temperature. Clamp it in place,
and raise the temperature to between 302 F (the "glass transition
temperature") and 340 F (the "softening" point) for a few hours,
depending on the thickness of the work.
In this case, no pre-drying is required. Sounds good. But only works
for simple, 2D shapes without sharp bends or compound curves.
2. Low temperature forming. This is for drape forming or gravity
forming, when gentle 3D contours might be required. Temperature is
between 340F and 370F, for a couple of hours. Also does not require
pre-drying to remove moisture.
3. Hi temperature forming. Good for complex 3D shape, sharp angles,
etc. In this case the material must be dried for about 10 hours at 250F
for each 1/8th inch of thickness, to totally remove all the moisture.
Then the temperature is raised to above 450F degrees, for a couple of hours,
depending on the thickness, and then a vacuum is used
to pull the material into the form.
So it looks like method #1, cold forming, will work for the bumper I
have in mind. My good wife suggested that I use parchment paper between the
form and the material to keep it from sticking, like the kind used for
baking cookies. She just happened to have a roll of it, purchased at
the local Kroger grocery store.
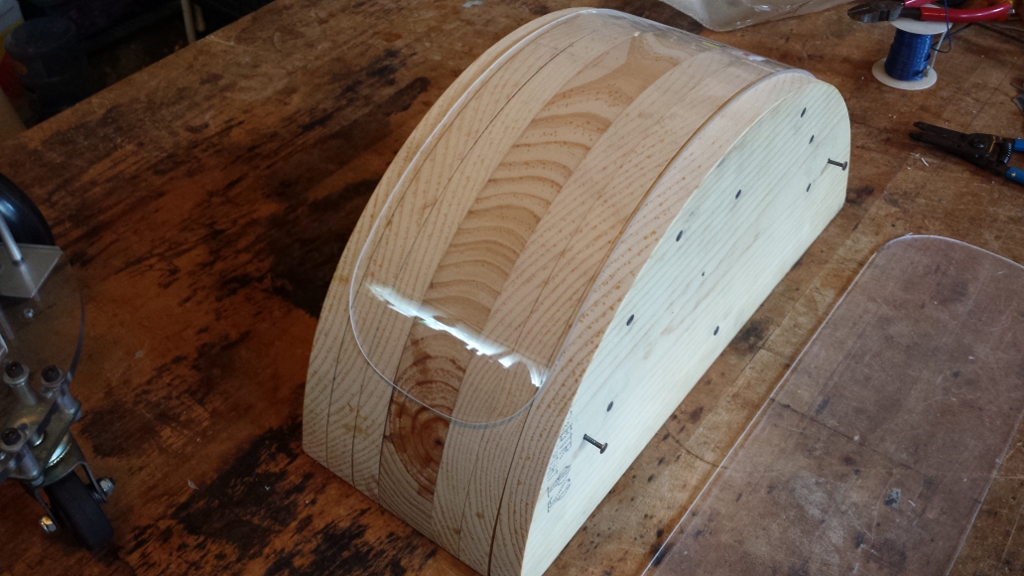
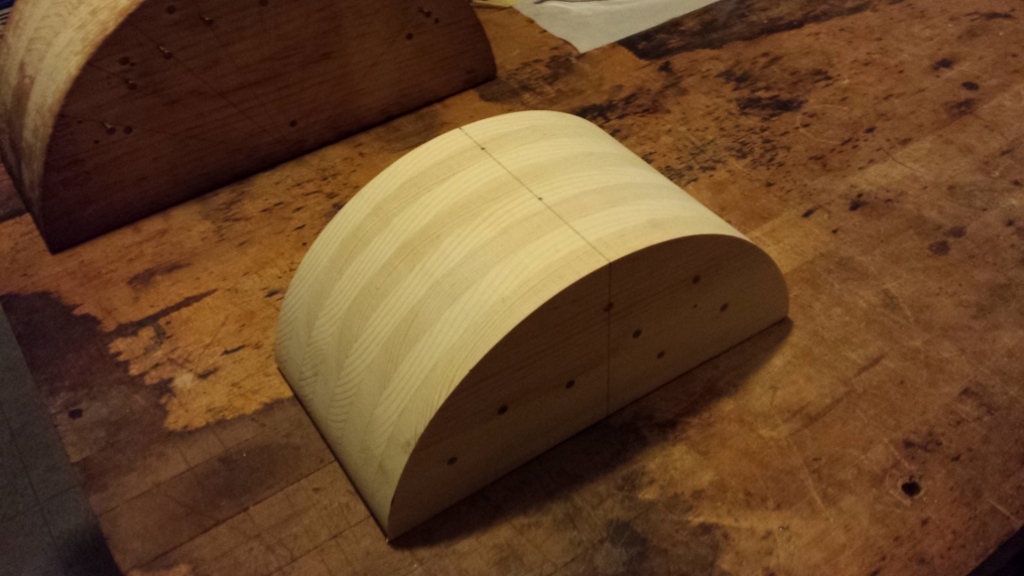
By this time I had decided that the radius of the curve of the wooden
form was incorrect, so I made a new one, slightly smaller, to better
match the curve of the robot:
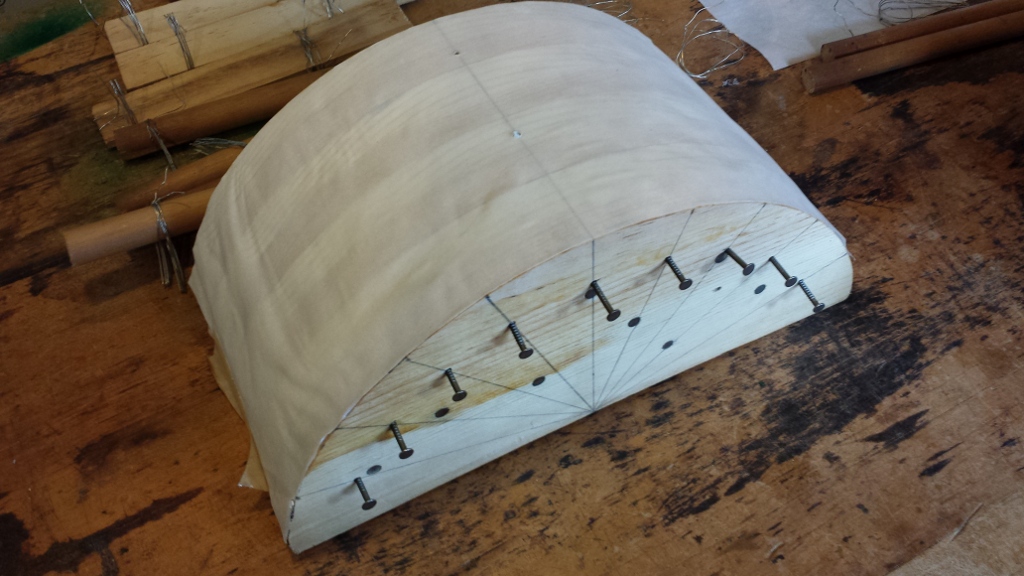
I had also learned that I needed more clamping points to hold the poly
in place while heating it since I intended to machine the piece while it
was still flat, and the machining produces points of weakness and flex
in the final shape. Here's the new form with it's parchment covering
and multiple attachment points for the clamps:
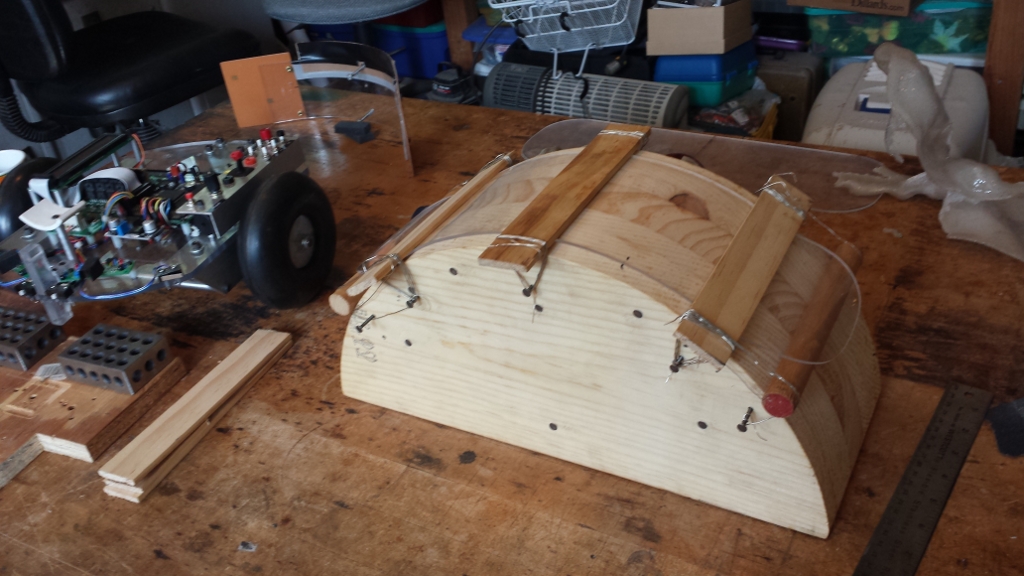
Then, with a newly machined polycarbonate blank clamped to the form in
multiple places, parchment between it and the wooden form, and the oven
thermometer reading 325F degrees, I put the whole thing in the oven for
two hours, and after removing the clamps, this is what emerged:
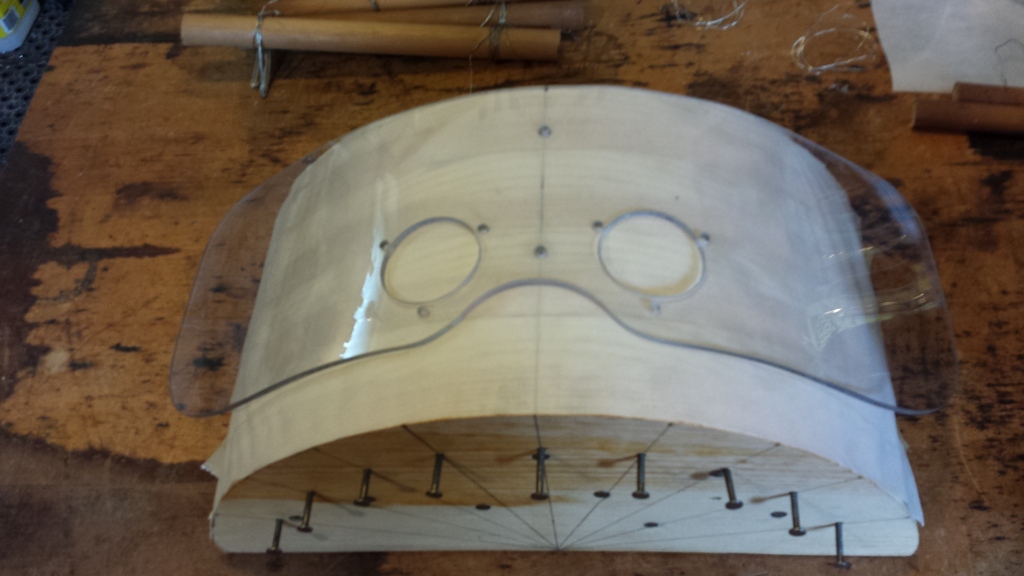
It is super tough, holds the shape even when I bend it severely, doesn't
crack, and remained transparent thoughout the heating process. The
latter is important because I have IR sensors looking through the bottom
half of the bumper.
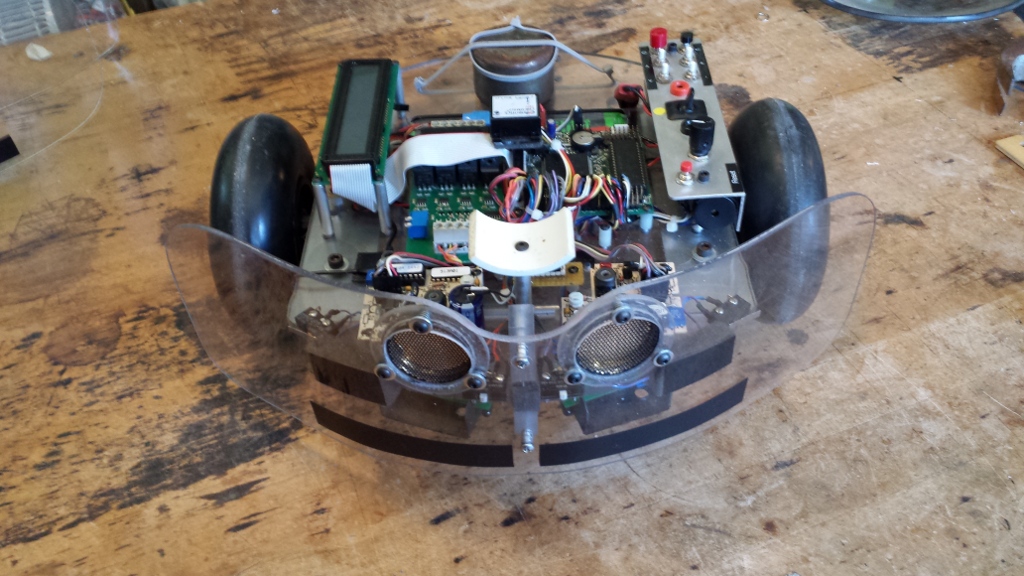
Here's the finished bumper with stereo Sonar and IR sensors installed,
mounted on the robot:
It works great, and is only slightly heavier than the plexiglass
original. I've been running it around my garage shop with the Sonar and
IR sensors turned off, letting it bump into things, and so far nary a
scratch.
As an aside, the polycarbonate has a higher index of refraction than the
plexiglass, which required slight adjustments to the IR sensors to get
the same coverage, but which also makes it much cooler to look at!
Hope this is useful.
Happy roboting,
01 July 2014
dpa


