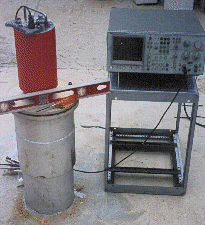

The installation of the seismometer begins with final adjustment of the instrument for free period and a level surface. It is assumed, because of the way the borehole-vault floor was poured, that the floor surface will be level. Final adjustment of the instrument free period is needed to adjust for any changes that may have occured during shipping or transport and to verify that all instruments are set exactly the same.
Because the sites at Lajitas are far from commercial
power, it is convenient to setup the seismometer prior
to moving all the equipment to the element location.

In some cases, the hole has accumulated small amounts
of water or flakes of rust, or even small pubbles.
The bottom on the hole is checked with a small telescope
and any problems removed.

Once the borehole vault is clean, the rest of the
seismometer installation may begin.